
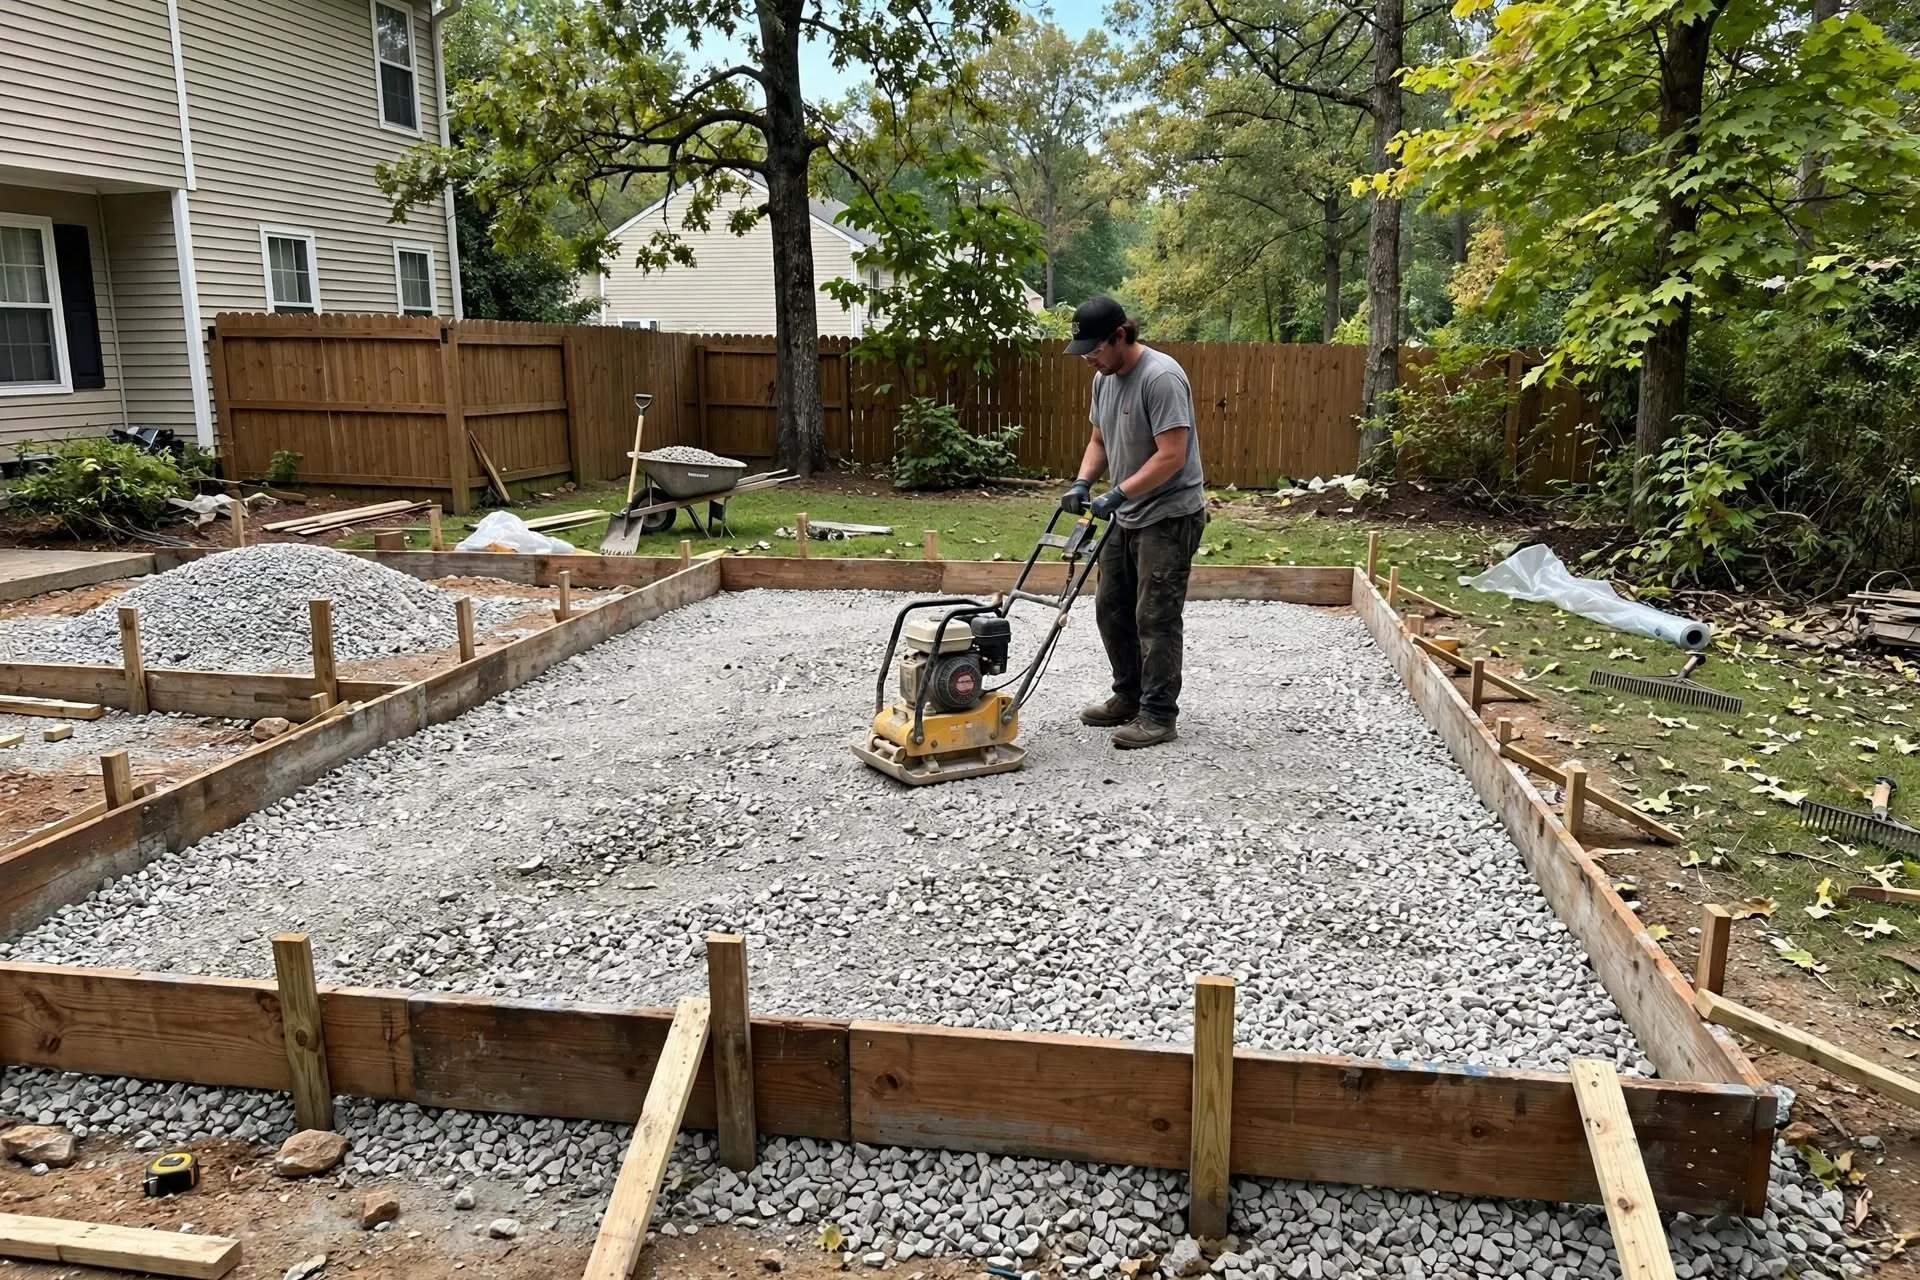
You want to pour a concrete slab that stays flat and doesn't crack after first winter. I have seen hundreds of slabs in Franklin - shed bases, patios, garage floors, small shop floors. The ones that still look perfect after 10 years all have one thing in common. It is not the concrete mix from plant. It is base underneath. A slab is only as strong as what it sits on. If ground under it moves, your slab will crack, sink, and hold water. So let's get base right, step by step, the way we show homeowners at our shop on Lakeview Drive.
Why Your Slab Life Depends on Base Preparation
I know you are excited to pour. You have forms in driveway, you are ready to call truck. But trust me, 80 percent of slab life is decided before concrete arrives. Think of base as bed frame and concrete as mattress. Would you put brand new expensive mattress on broken frame? No. Same with slab. If base is soft, full of roots, or loose, slab has no chance. You will get cracks that run corner to corner and low spots where water sits for days. You will end up renting jackhammer next summer and doing it again.
What Happens When Base is Wrong
When you leave dark topsoil full of roots, that topsoil rots in six months and leaves voids under slab. When you dump loose fill on low side without compacting, first heavy Tennessee rain settles that fill by two inches and your slab drops with it. When you skip gravel base on Franklin clay, water stays trapped under slab and in January that water freezes and lifts slab up. I have seen brand new 12x16 shed slab crack in three places because homeowner skipped compaction to save two hours. Saving two hours cost him two thousand dollars. So we always tell everyone at Falcon Rentals - Our gear is in good working condition is kept clean and safe and ready to work. A clean, compacted base is what protects you.
Why Franklin Clay Needs Extra Care
Franklin has heavy clay soil. Clay is like sponge. When wet it expands, when dry it shrinks. If you pour directly on clay without gravel, your slab moves with seasons. In summer you get gap under edge, in winter clay pushes up. That's why we always build on firm light brown subsoil plus 4 to 6 inches crushed stone. Topsoil is for flower beds, not under concrete. Keep that in mind and your slab will thank you for years.
How to Mark and Measure Your Slab Area Correctly
Before you think about renting anything, spend thirty minutes marking. Drive four wooden stakes at four corners of your future slab. Make outline six inches bigger than final size so you have room for forms. Tie mason string around stakes at height you want finished slab. Clip small line level on string. When bubble is centered, string is level. Now measure down from string to ground at each corner and write numbers. That difference is your slope. Also measure both diagonals. If both diagonals are equal, your layout is square. If not, move one stake till equal. This string line method is old school but contractors still use it because it works and costs five dollars.
Tools You Need Before You Start
You don't need laser level for small shed or patio slab. You need stakes, string, line level, tape measure, marking paint, 8-foot straight 2x4 and 4-foot level. That's it. If your slab is bigger than 12x16 or slope is more than 10 inches, then you will need small machine that fits through 36-inch gate. Franklin backyards are tight with fences, AC units and deck stairs. Big skid steer won't fit.
How to Make Forms Square and Level
Use 2x6 lumber for 4-inch slab and 2x8 for 6-inch slab. Set forms on edge, drive wood stakes every 3 to 4 feet outside forms so forms don't bow when concrete pushes. Check level along top of forms with 4-foot level. Top of forms is top of slab, so this has to be perfect. Lightly oil inside of forms with form oil or even old cooking spray. Forms strip off easy after pour and you can reuse lumber. Would you bake cake without preheating oven? Same logic. If forms are not level and square, slab never will be.
Step-by-Step Process to Prepare Concrete Slab Base
This is exact process we show every weekend, just smaller for DIY.
Step 1 - Strip Sod and Topsoil
First cut grass. Don't use shovel for big area. Sod cutter cuts 18-inch wide strips you can roll like carpet. Roll them up and reuse to patch bare spots elsewhere in yard. Then scrape off top 2 to 3 inches of dark topsoil. That dark soil is full of roots and organic matter. It will decompose and cause sinking. Pile it to side for garden beds. You want to build on firm light brown clay subsoil. That is your solid foundation. For this work many homeowners search for yard equipment rental in Franklin. Our lawn care category has sod cutters, plate compactors and other machines that come clean and ready.
Step 2 - Cut High Side and Fill Low Side in Thin Lifts
Most yards are not flat. You have high side near house and low side away. You need to cut high and fill low till you get rough level. Start on high side and cut in thin 2-inch layers and push that soil to low side. Never dump big loose pile on low side at once. That loose pile is what causes sinking next year.
- Spread fill in 4-inch lifts only
- Run plate compactor over each lift with overlapping passes like mowing lawn
- You will hear compactor sound change from dull thud to high rattle when soil is tight
- For 8 to 10 inch fill, you need 2 to 3 lifts on low side
If your slope is more than 8 inches, doing it by hand with wheelbarrow will take full weekend and your back will hate you. This is when most homeowners decide to rent a mini skid steer. We have 500 lb Track Mini Skid Steer Dingo w/ Tooth Bucket Rental and 1000 lb Track Mini Skid Steer Dingo w/ Tooth Bucket Rental. Both fit through tight gates and have attachments like auger drive and landscape rake. Same weekend special applies.
Why Compaction in 4-Inch Lifts is Must
I can't say this enough. Thin lift compaction is secret of every good contractor. When you spread 4 inches and compact, air comes out and particles lock. When you dump 12 inches loose and run compactor only on top, bottom 8 inches stays loose. You think it is compacted because top feels hard, but bottom settles later. Take extra hour now, save jackhammer later.
Step 3 - Install Gravel Base and Compact Again
For Franklin clay, you need 4 to 6 inches of compacted 3/4 inch minus crushed limestone. This stone has fines that lock together when compacted. It drains water unlike round river rock.
- Dump gravel and spread roughly with shovel
- Spread 2 inches, compact, spread another 2 inches, compact again
- Check flatness with long 2x4 - slide 2x4 across gravel, if it rocks you have high spot, if daylight under, low spot
- Final gravel should feel hard as driveway when you walk
Step 4 - Final Pitch Check for Drainage
Before you call concrete truck, walk entire base. Does it feel soft anywhere? Jump lightly. If heel sinks, compact again. For outdoor patio slab, keep 1 percent to 2 percent pitch away from house - that is 1/8 to 1/4 inch drop per foot. You won't feel it walking, but water will run off. No pitch means water pools, mosquitoes love it, algae grows. For indoor shed slab, keep perfectly level both ways and diagonally. Let base sit overnight if you can. Low spots often show next morning after base settles. Fixing low spot with handful of stone dust now takes 30 seconds. Fixing after concrete takes 30 minutes with chisel.
How Falcon Rentals Makes Slab Jobs Easy in Franklin
Here is what most blogs don't tell you. Slab prep creates mess in driveway - shovels, compactor, stakes, lumber, wheelbarrow, gravel pile everywhere. You step over tools, lose tape measure, waste hour searching.
This is where a construction trailer rentalchanges your whole weekend. Many contractors in Franklin rent our 4' x 6' Tilt Light Duty Trailer to keep plate compactor, hand tools, extra stakes and forms in one organized place overnight instead of leaving everything scattered in driveway or garage. You lock trailer, come next morning and everything is ready. No lost tools, no trip to store. Same trailer also helps haul away sod and extra topsoil to dump site.
- Location: 1222 Lakeview Drive, Franklin, TN 37067
- Call Mike: (615) 554-0013
- Weekend Special: Our weekend rate gives you a one-day rental from 6:00 AM Saturday to 8:00 AM Monday, with up to 8 hours of run time on metered equipment. Our blog page also says 6:00 AM Friday to 8:00 AM Monday for one-day price - same deal for homeowners.
- Free Delivery: Free delivery within 10 miles - covers Franklin, Brentwood, Nolensville. Beyond 10 miles $3.50 per mile.
- Our Promise: 100% satisfaction with all our products and Our gear is in good working condition is kept clean and safe and ready to work.
- Locally owned and operated and HABLAMOS ESPAÑOL
Conclusion
Preparing concrete slab base is not about pouring concrete. It is about what you do before truck arrives. Strip sod and topsoil, set level and square forms, cut high and fill low in thin 4-inch lifts with compaction each time, install 4 to 6 inch crushed limestone base and compact again, and keep tiny pitch for drainage if outdoor. Don't rush compaction. That is difference between slab that lasts 20 years and one that cracks in 2. Rent small machines that fit through 36-inch gate, keep site organized with trailer, check level constantly. When ready, come to 1222 Lakeview Drive. We will show you how to use machine 10 minutes before you leave.
FAQs
1. How thick should gravel base be before pouring concrete slab in Franklin TN?
For Franklin clay soil you need 4 to 6 inches of compacted 3/4 inch minus crushed limestone. Compact in 2-inch lifts with plate compactor. This gives drainage and stops sinking. Our plate compactor is included in weekend special.
2. What is weekend special for construction trailer rental and mini skid steer?
Weekend special gives you one-day rental from 6:00 AM Friday or Saturday to 8:00 AM Monday with up to 8 hours run time on metered equipment. You pay only 1-day rate. Applies to 4' x 6' Tilt Light Duty Trailer, 500 lb and 1000 lb Dingo Mini Skid Steer and lawn equipment.
3. Can I prepare concrete slab base without heavy equipment?
If slab is small like 8x10 shed base with less than 6-inch slope, you can do with shovels and hand tamper. For anything bigger than 10x12 with more than 8-inch slope, rent a mini skid steer and plate compactor. They save full day of digging and give much better compaction.
4. Do you deliver construction trailer and mini skid steer for free?
Yes, free delivery within 10 miles of 1222 Lakeview Drive, Franklin TN 37067. Covers Franklin, Brentwood, Nolensville. Beyond 10 miles $3.50 per mile. All gear comes clean, safe and ready to work.
5. How long to wait after preparing base before pouring concrete?
If you compacted in thin lifts with plate compactor, you can pour next day. Walk on base - if hard as driveway, ready. If you dumped loose soil without compaction, wait at least a week and let couple rains settle, or it will sink under slab.